Client Accounts
Client accounts are established to provide clients with secure access to the client portal, enabling them to:
- Monitor Project Status: Stay updated on the current state of their projects.
- Review Detailed Reports: Access comprehensive reports in real-time.
- Identify Assigned Consultants: See which security consultants are working on their projects.
- Analyze Findings: View statistics of each finding based on their status.
- Manage Project Assets: Oversee and manage assets associated with their projects.
This centralized access enhances collaboration and ensures clients remain informed about their ongoing engagements.
1. Creating a Client Account
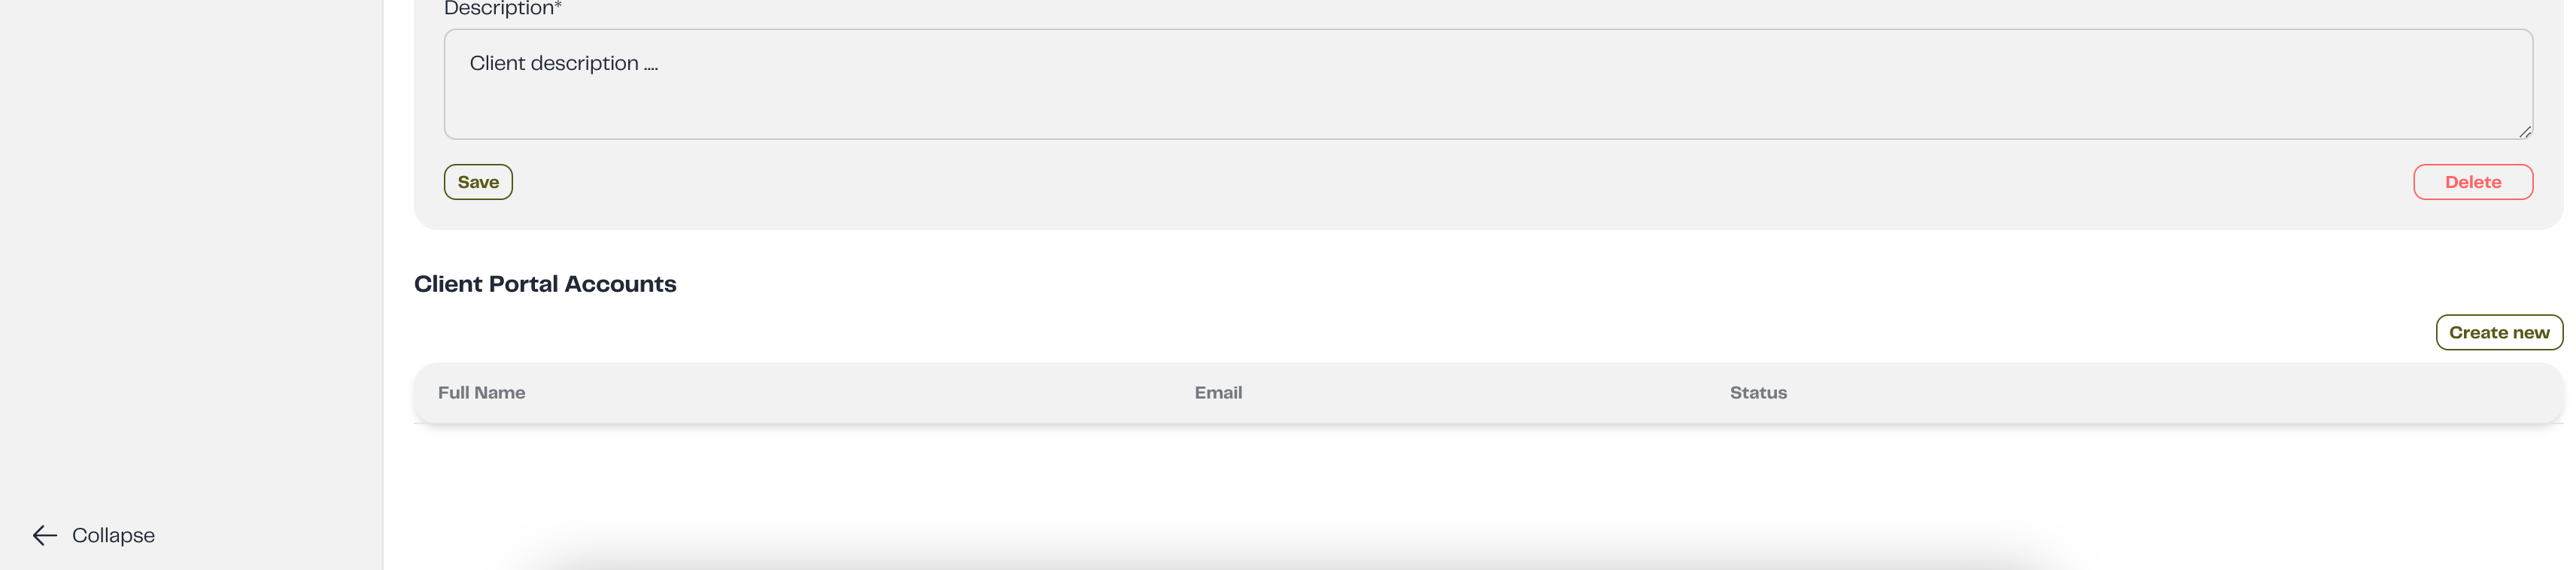
Step 1: Navigate to the Client Details Section
Step 2: Open the "Create New" Modal
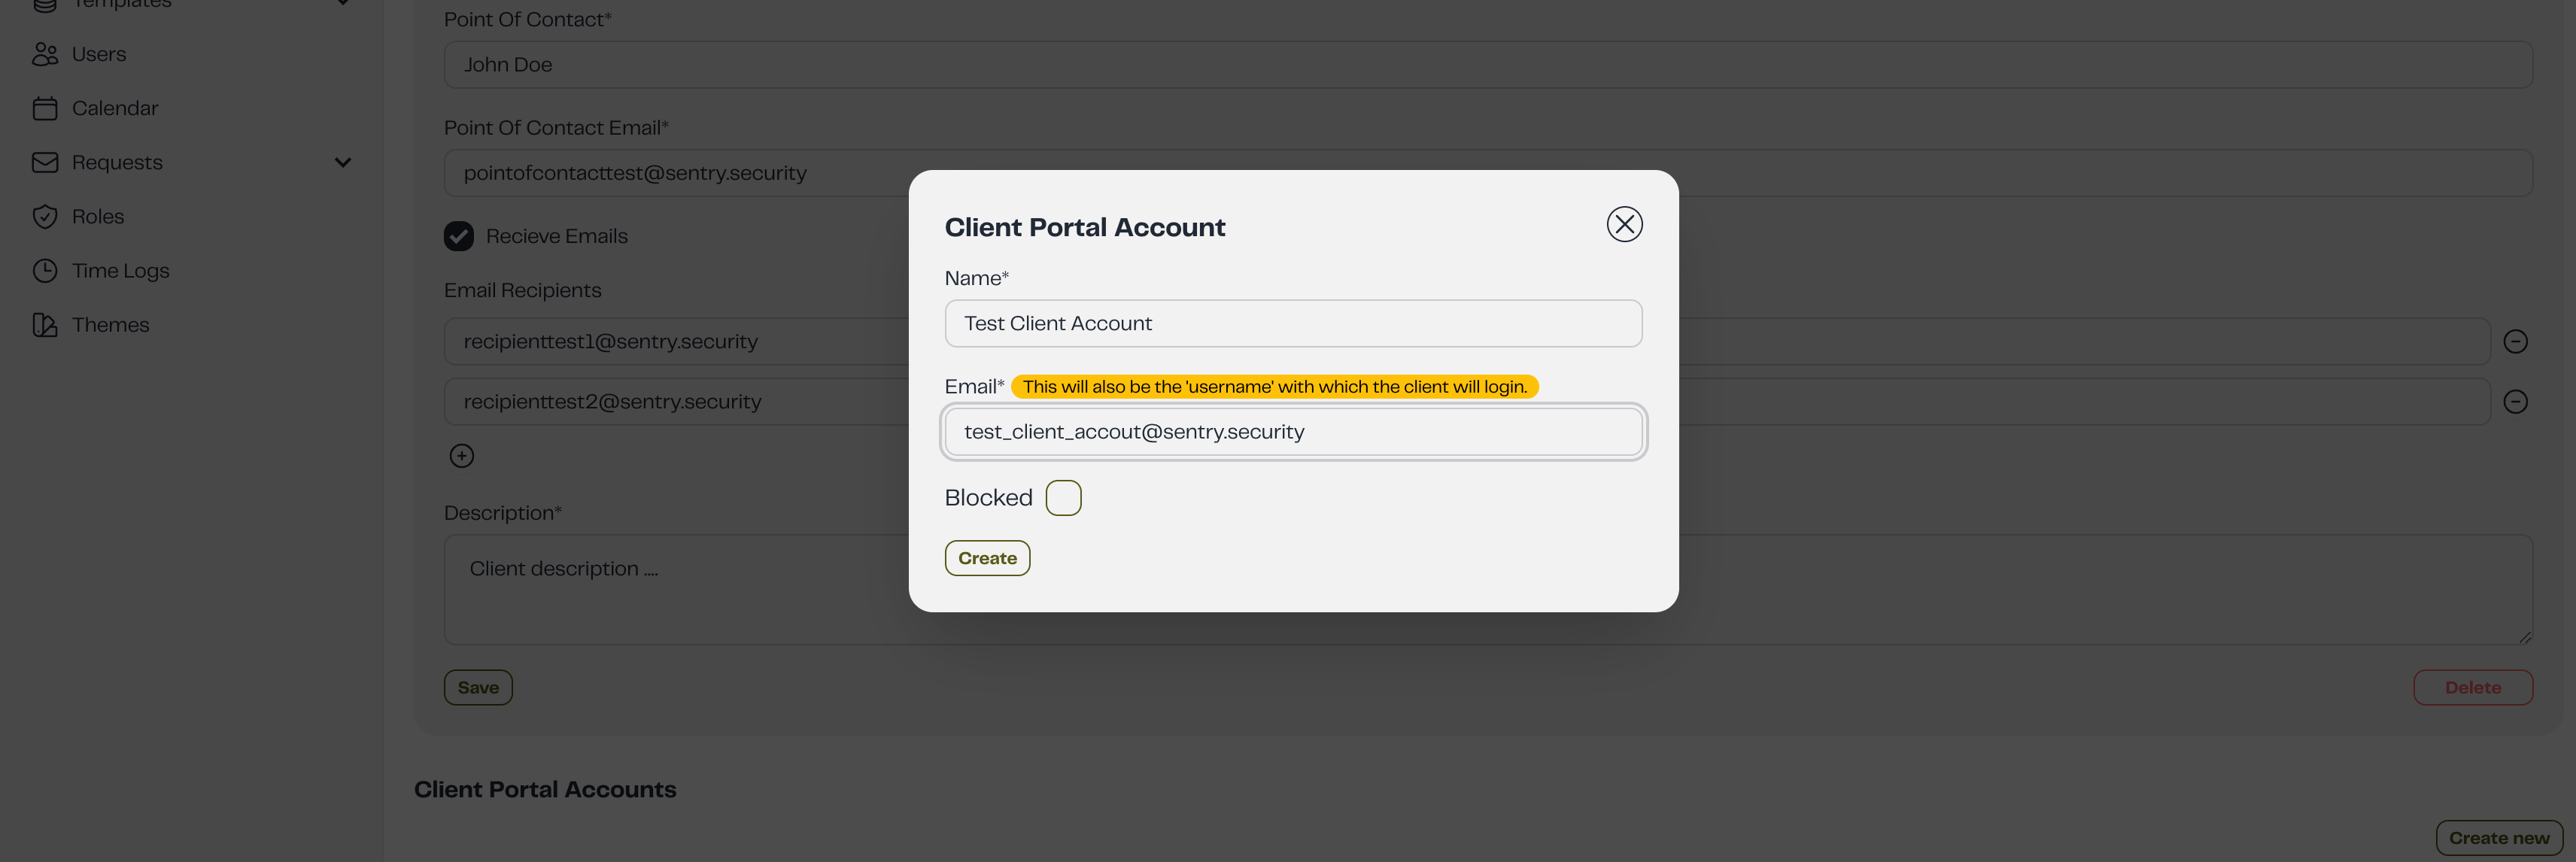
Step 3: Fill in Account Details
In the modal, provide the following information:
- Name: Enter the full name of the user.
- Email Address: Enter the user's email address.
- Blocked: Check this box if you wish to block the user from accessing their account. Leave it unchecked to allow access.
2. Updating a Client Account
Step 1: Identify the account you wish to modify.
Step 2: Click the pencil icon (edit) adjacent to the account to open the edit modal.
Step 3: Update Account Details
Within the modal, you can adjust the following fields:
- Name: Change the user's name as needed.
- Email Address: Revise the email address if necessary.
- Blocked: Select or deselect this option to block or unblock the user.
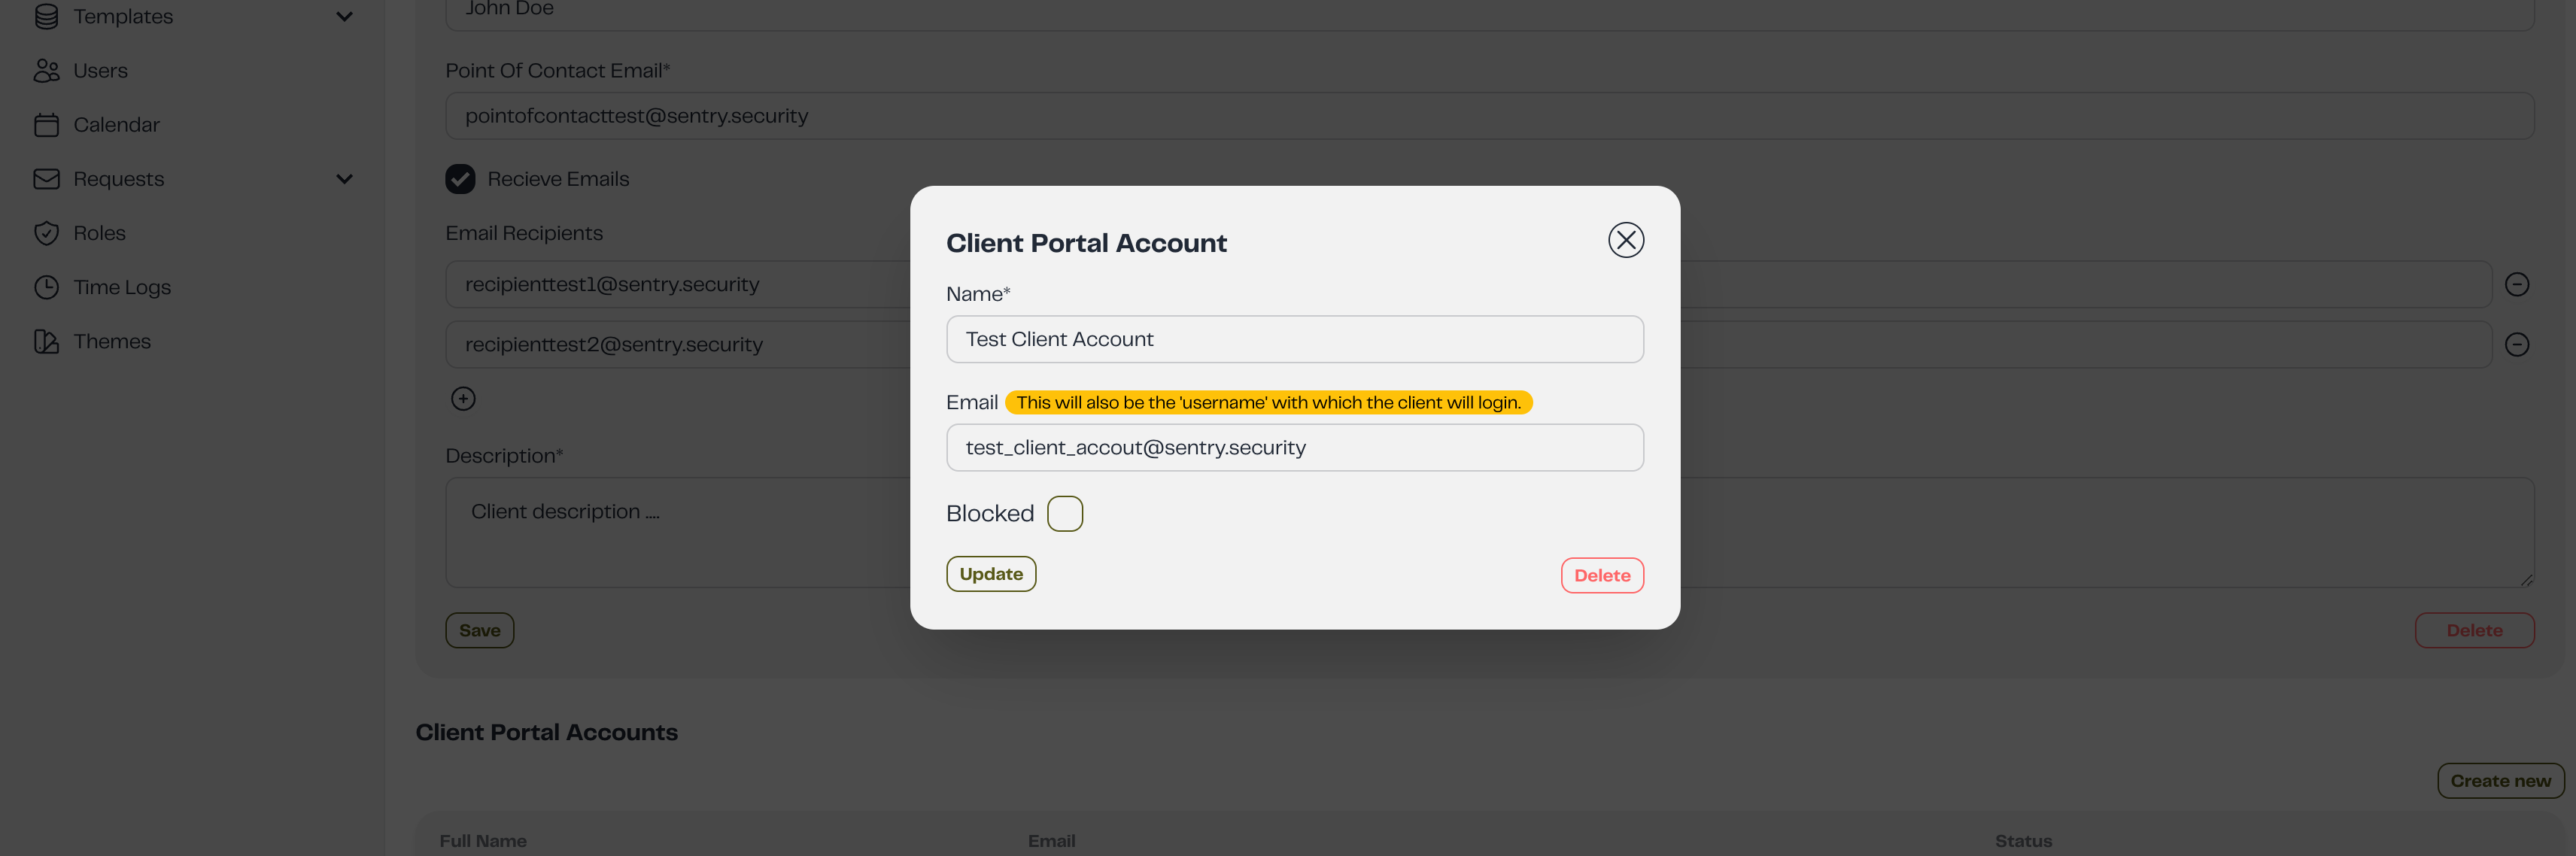
Step 4: Save Changes
- Once you've made the necessary modifications, click the Update button.
Blocking a Client Account
Blocking a client account will immediately restrict their access to the client portal.
3. Deleting a Client Account
Step 1: Click the pencil icon (edit) next to the account to open the edit modal.
Step 2: Click the Delete button to remove the account.
Deleting a Client Account
Deleting an account is a permanent action and cannot be undone. Confirm your intention before proceeding.